之前的电脑上装了
Übersicht,是一个桌面自定义的软件,之前用起来还不错,不过之前的插件是用CoffeeScript写的,说实话,写起来挺麻烦的,现在换成React了,应该会比之前方便。找了一个颜值不错的组件也改了下子。下面就来看看我改的地方吧。
引用之前官网上的话
密切关注您的机器和世界上正在发生的事情还是挺贴切的Keep an eye on what is happening on your machine and in the World.
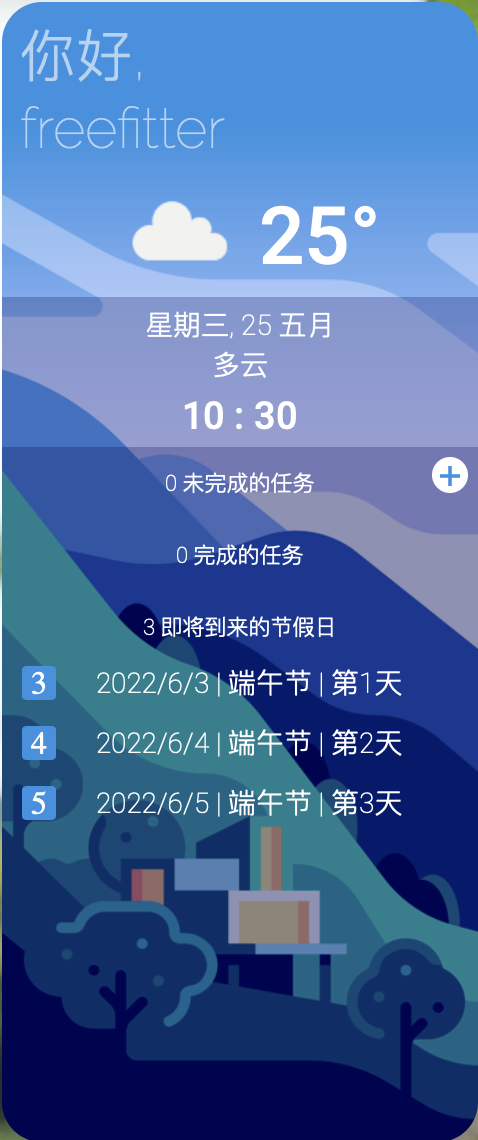
0.成果展示
增加了即将到了的节假日,方便我们查看还有多久到假期。下面是成果展示。之前的项目地址在这边。TodoListWidget点击直达。
1.代码修改
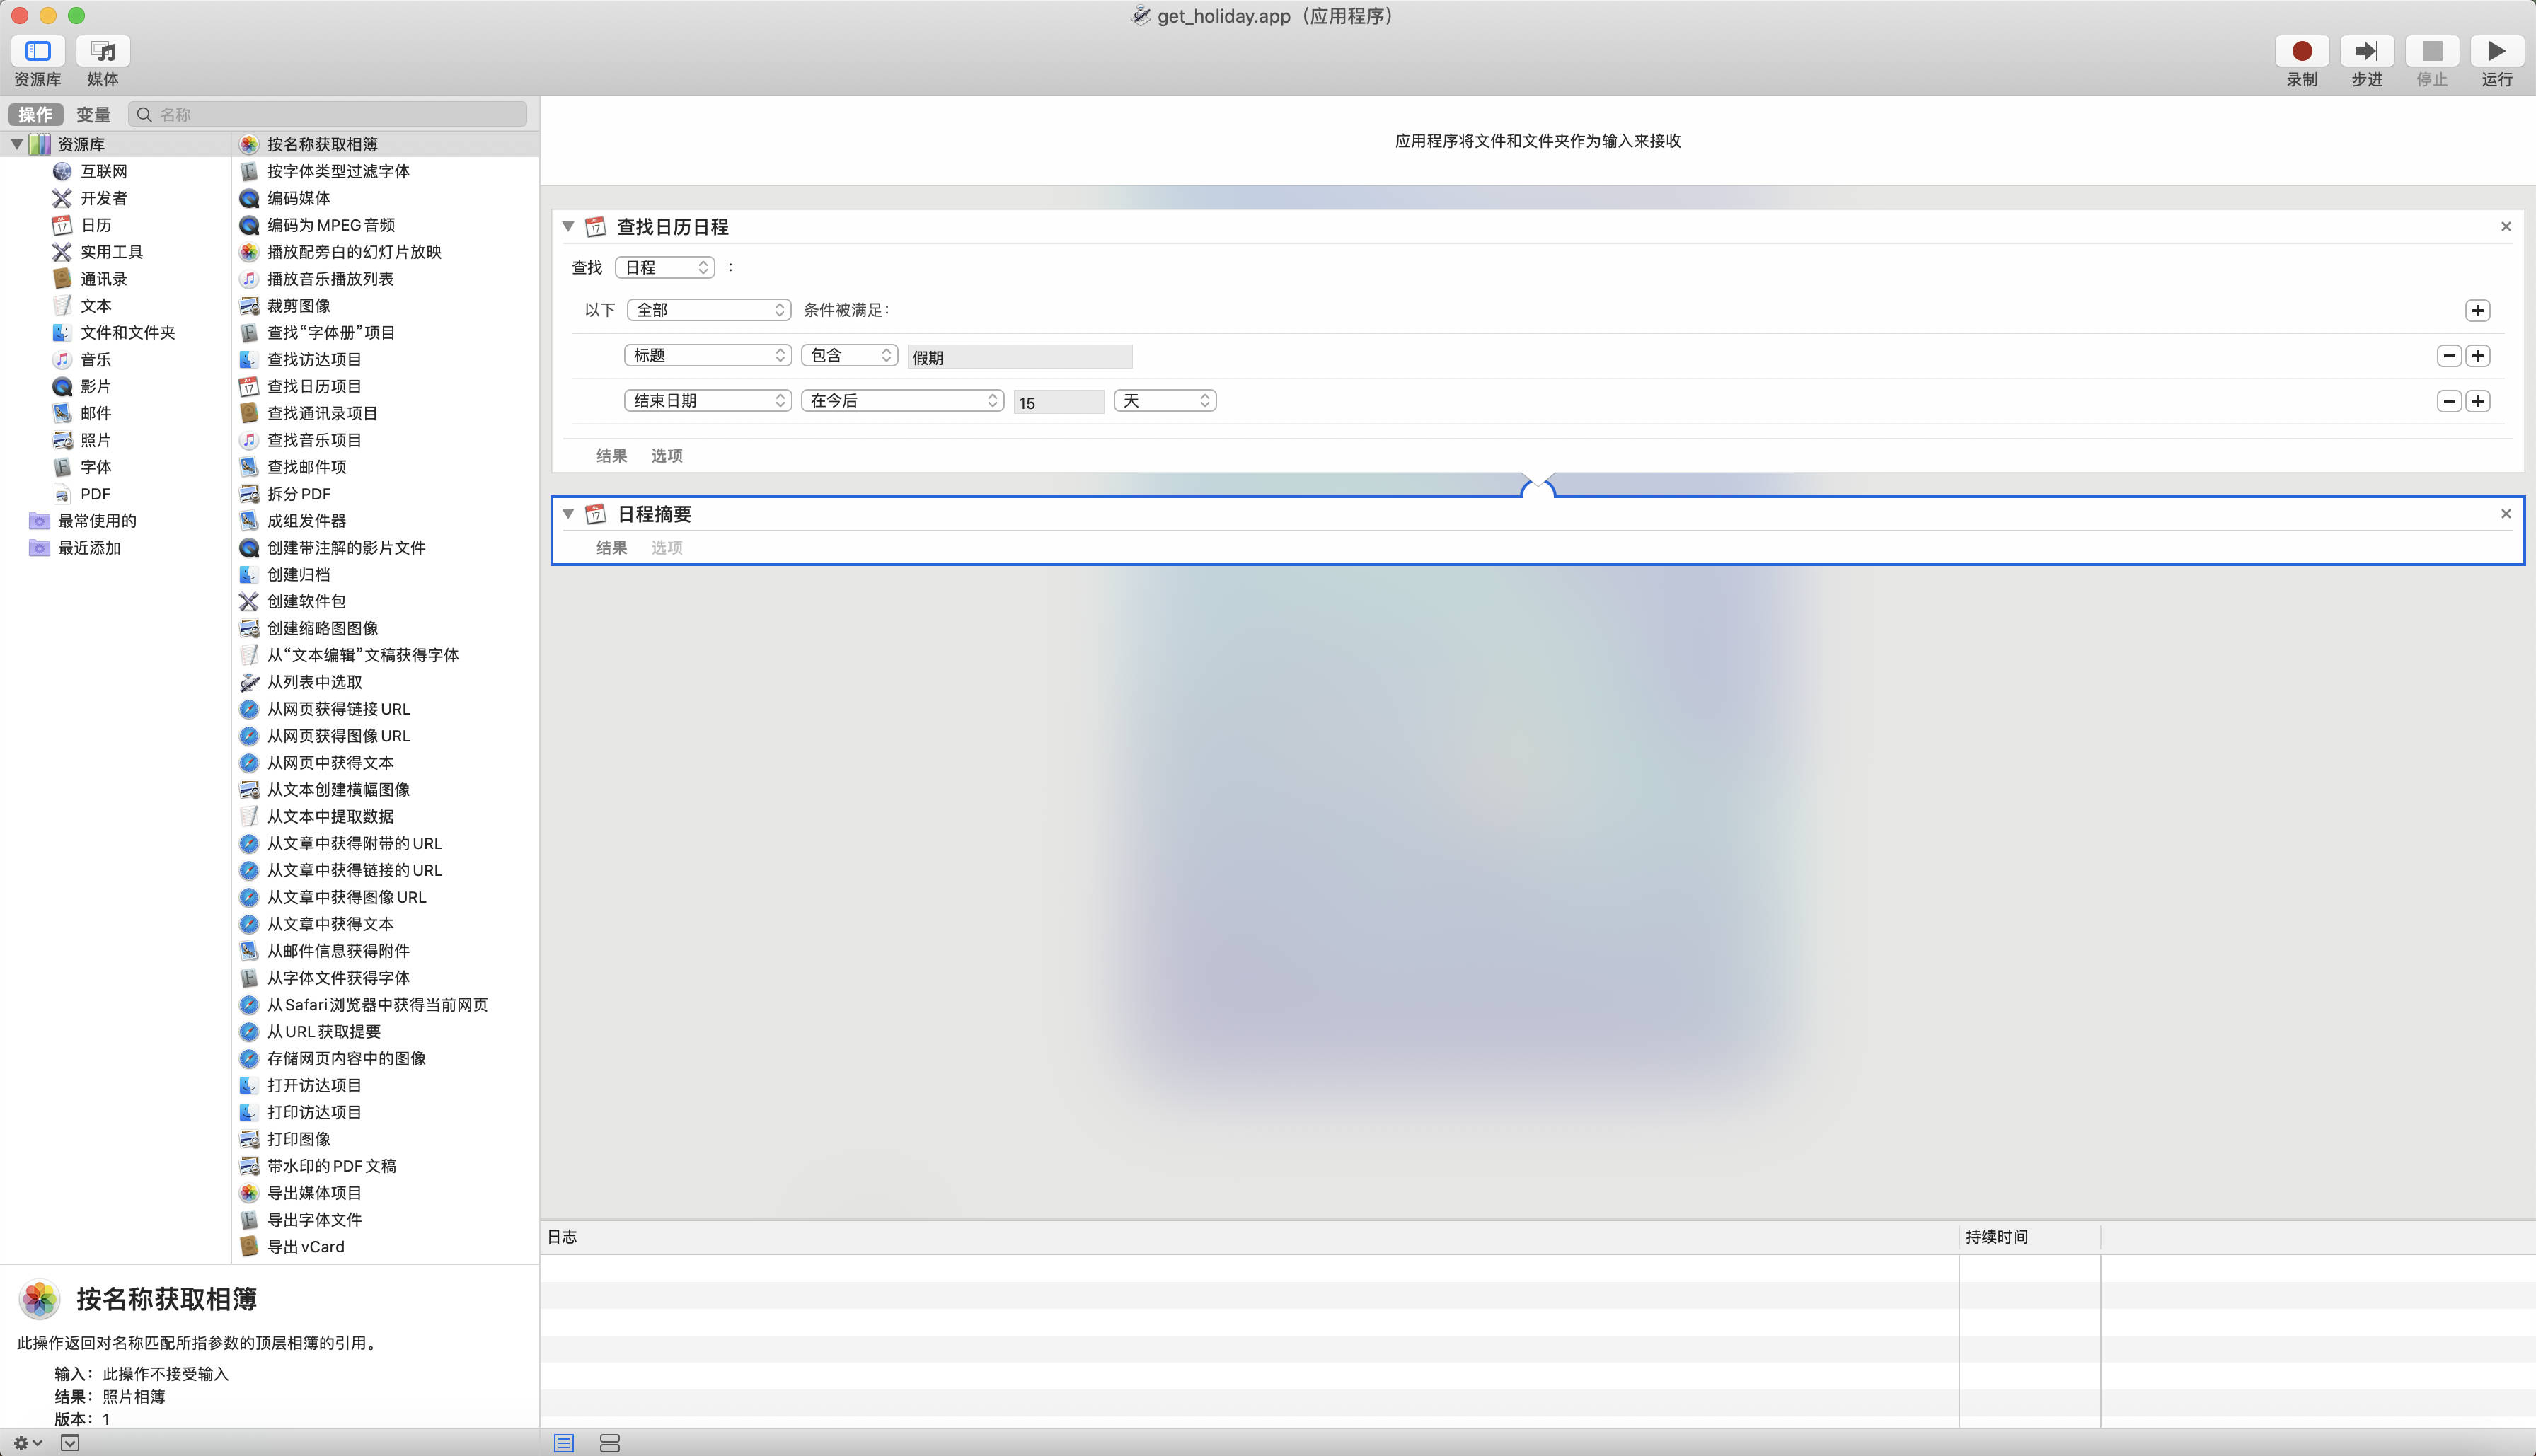
- 增加了一个自动操作,就是获得未来15天内节假日的。
返回的结果如下:
日程共计:3

EVENT 1 OF 3
Summary:	端午节 假期 第1天/共3天
Status:	none
Date:	2022/6/3 to 2022/6/4
Time:	上午12:00:00 to 上午12:00:00
Notes:	五、端午节:6月3日至5日放假,共3天。

放假通知: http://www.gov.cn/zhengce/content/2021-10/25/content_5644835.htm

EVENT 2 OF 3
Summary:	端午节 假期 第2天/共3天
Status:	none
Date:	2022/6/4 to 2022/6/5
Time:	上午12:00:00 to 上午12:00:00
Notes:	五、端午节:6月3日至5日放假,共3天。

放假通知: http://www.gov.cn/zhengce/content/2021-10/25/content_5644835.htm

EVENT 3 OF 3
Summary:	端午节 假期 第3天/共3天
Status:	none
Date:	2022/6/5 to 2022/6/6
Time:	上午12:00:00 to 上午12:00:00
Notes:	五、端午节:6月3日至5日放假,共3天。

放假通知: http://www.gov.cn/zhengce/content/2021-10/25/content_5644835.htm
这个节假日是GitHub上china-holiday-calender的这个项目。大家订阅就完事了。几个主要的地方的代码贴下子。这个是获得相关信息的。在actions.mjs文件中
const getComingHoliday = async () => {
    let stdout;
    try{
        stdout = await run(`automator "${PATH}/automator/get_holiday.app"`);
    }catch(e){
        stdout = e.message;
    }
    const matches = [...stdout.matchAll(/Summary:\s*(.*)\n/g)];
    const dates = [...stdout.matchAll(/Date:\s*(.*)\n/g)];
    let dateArr = dates.map(group => group[1]);
    let matArr = matches.map(group => group[1]);
    dateArr.map(function(value, index) {
        let dateStr = value.split(" ")[0];
        let holidayArr =  matArr[index].split(" ");
        matArr[index] = dateStr + " | " + holidayArr[0] + " | " + holidayArr[2].split("/")[0];
    })
    return matArr
}接着在首页展示就行,在index.jsx文件中
<ListContainer
   dispatch={dispatch}
   reminders={reminders.holiday}
   done={false}
   flag={true}
   sentences={{plural: config.todo.commingholiday, singular: config.todo.commingholiday}}
   color={current_activeColor}
/>
展示改了下子,在 components/Task.jsx中增加了标志判断,以显示日期标签。
import { css } from "uebersicht";
import styles from "../styles.mjs";
import dispatchers from "../dispatchers.mjs";

const {text} = styles;

export const Task = (props) => {

    const reminderButtonHandler = () => {
      dispatchers.changeReminderStatus(props.dispatch, {done: props.done, name: `${props.children}`, id: props.id})
    }
    let strs = props.children.split(" ");
    let day = strs[0].split("/")[2];
    if(props.flag){
      return (
      <div className={`${css({display: "flex", alignItems: "center", marginBottom: "10px"})}`}>
        <span className={`${css({
            width: "13px",
            height: "13px",
            borderRadius: "2px",
            border: "1px solid",
            textAlign: "center",
            lineHeight: "15px",
            color: "white",
            padding: "1px",
            borderColor: props.color,
            backgroundColor: props.flag ? props.color : "transparent",
            })}`}>{day}</span>
        <p className={`${css({marginLeft: "20px", textAlign: "left"})} ${text}`}>{props.children}</p>
      </div>
    )
    }else{
      return (
        <div className={`${css({display: "flex", alignItems: "center", marginBottom: "10px"})}`}>
          <button onClick={reminderButtonHandler} className={`${css({
            width: "15px",
            height: "15px",
            borderRadius: "8px",
            border: "1px solid",
            borderColor: props.color,
            backgroundColor: props.done ? props.color : "transparent",
            })}`}></button>
          <p className={`${css({marginLeft: "20px", textAlign: "left"})} ${text}`}>{props.children}</p>
        </div>
      )
    }
  }
2.写在最后
自己动手改改,学习学习别人的写法喝想法,还是很棒的。抽空学习下